Cleaning the Snout
The snout requires regular preventative maintenance. Agilent recommends cleaning the snout on a weekly to monthly basis.
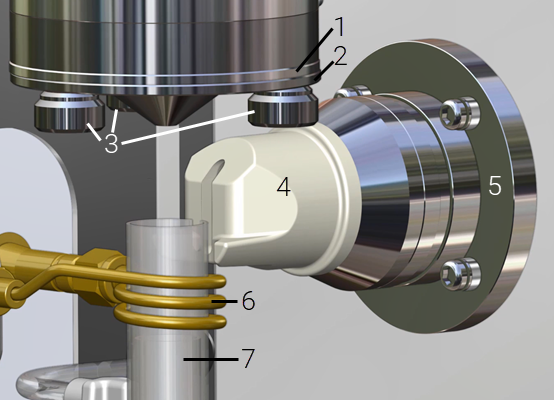
Torch compartment
Where:
1. Cone |
4. Snout |
7. Torch |
2. Axial window assembly |
5. Radial window assembly |
|
3. Cone thumb screws |
6. RF coil |
|
 |
It is essential that appropriate protective clothing be worn when handling components contaminated with chemicals. |
 |
This video demonstrates how to clean the snout. |
To clean the snout:
- Remove the torch (if present).
- Gently pull the snout off the radial window assembly and then slide it towards the right.
- Wash with a dilute detergent to remove any solid build-up from inside the snout.
- Rinse both the inside and outside of the snout with water.
- If any contamination remains, wipe it with a lint free tissue to remove.
- Thoroughly dry both the inside and outside of the snout with compressed air or nitrogen.
- To replace the snout, slide the snout in and then gently push to fit the snout onto the radial window assembly.
- Check snout alignment.
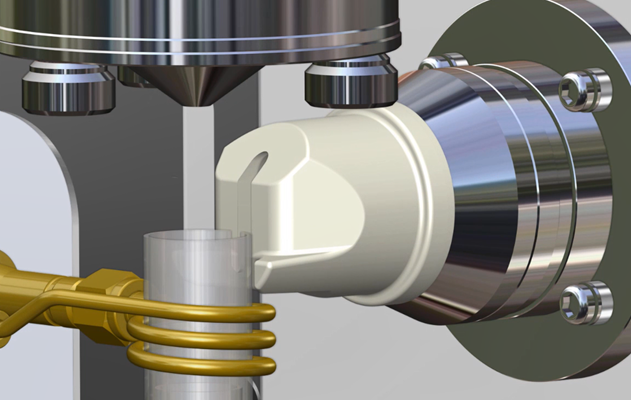
- The tabs on the snout should be at the bottom and horizontal to each other. See small red squares on the image below.
- Insert the torch. The slot on the torch quartz tube should be parallel with the slot on the snout. See tall red rectangle on the image below.
- Gently slide the snout out toward the torch, until the end of the
snout almost touches the wall of the torch.

Snout alignment