Replacing the Radial Pre-optics Window
The axial pre-optics window protects the internal components from particulates and fumes from the plasma.
 |
Always turn off your instrument before attempting to the window and do not operate the instrument while the window is removed. |
There are three steps to the procedure:
- Removing the radial pre-optics window assembly
- Replacing the radial pre-optics window
- Installing the radial pre-optics window assembly
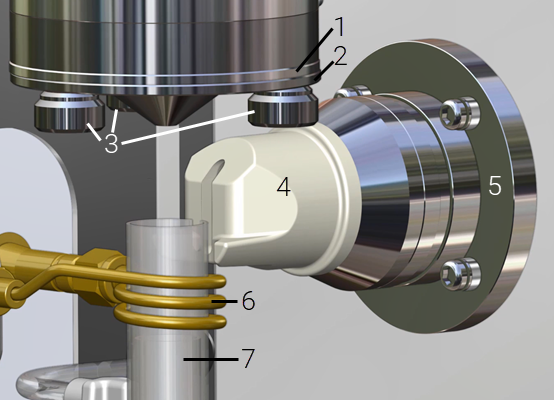
Figure 1. Torch compartment
Where:
|
1. Cone |
4. Snout |
7. Torch |
|
2. Axial pre-optics window assembly |
5. Radial pre-optics window assembly |
|
|
3. Cone thumb screws |
6. RF coil |
|
 |
This video demonstrates how to replace the radial pre-optics window. |
To remove the radial pre-optics window assembly:
- Turn off the ICP-OES instrument.
  |
Hot Surface |
- Remove the torch and snout. See Figure 1.
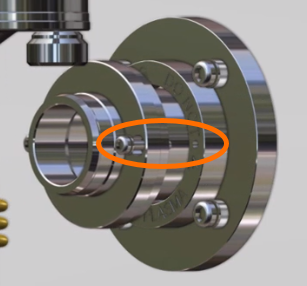
- Using a Phillips head screwdriver, unscrew the two radial pre-optics window assembly screws.
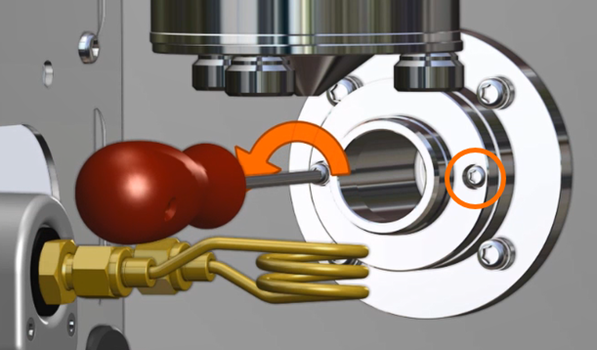
Figure 2. Removing the two radial pre-optics window assembly screws - Gently pull the radial pre-optics window assembly towards you and then remove.
|
Do not hit the RF coil. |
- Check the radial pre-optics window for contamination. Replace or clean if needed.
To replace the radial pre-optics window:
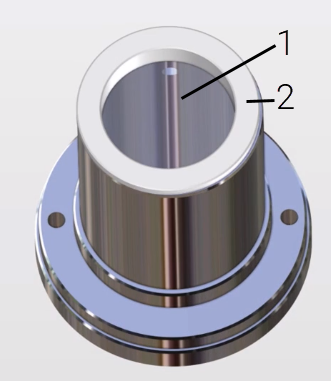
Figure 3. Radial pre-optics window assembly
Where:
|
1. Radial pre-optics window |
2. Radial window nut |
- Unscrew the radial window nut from the assembly.
- Remove the radial pre-optics window from the assembly. It should slide out easily.
|
Always wear gloves when replacing the window. Hold the window by the edges. Oils from your hands will damage the window. |
- Insert the radial pre-optics window into the assembly.
- Screw in the radial window nut into the assembly.
To install the radial pre-optics window assembly:
- Insert the two radial pre-optics window assembly screws into the assembly.
- Insert the radial window assembly into the instrument.
- Line up the two screws with the screw holes.
- Tighten the two radial pre-optics window assembly screws.
- Slide the snout in and then gently push to fit the snout onto the radial pre-optics window assembly.
- Check snout alignment
- The tabs on the snout should be at the bottom and horizontal to each other. See the red rectangle on the image below.
- Insert the torch. The slot on the torch quartz tube should be parallel with the slot on the snout. See red rectangle on the image below.

Snout alignment