Semi-Demountable Torch Assembly and Disassembly
The semi-demountable torch models allow the torch quartz tube to be separated from the torch body and injector for easier cleaning.
 |
To prevent damage to the torch, always take care when handling or storing it. To prevent damage to the instrument, do not use the torch if it is damaged. |
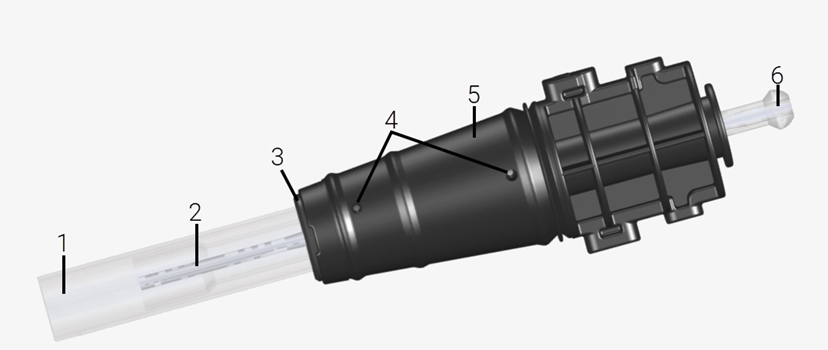
Torch components where 1 is the torch outer tube set, 2 is the injector, 3 is the seal, 4 is the gas ports, 5 is the torch body, and 6 is the ball joint
Torch assembly
|
This video demonstrates how to assemble the semi-demountable torch. |
To assemble the torch:
- Position the flat side of the torch seal so that it faces the top of the torch quartz tube.

Flat side of torch seal -
Slide the torch seal onto the tub-set from the bottom.

Torch seal on torch quartz tube - Position the torch seal so the top face of the seal is aligned with the bottom of the "T" alignment mark.
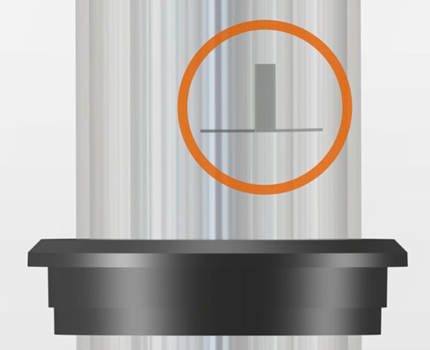
Alignment mark
-
Maintaining a straight parallel movement, carefully slide the quartz outer tube-set into the torch body. Avoid contact between the quartz tube-set and the injector.
Torch inserted into torch body -
Position the torch quartz tube so that the groove on the torch body aligns with the etch mark on the torch quartz tube.
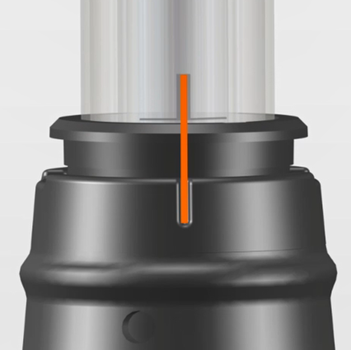
Torch alignment -
Press the torch fully into the torch body and then press down on the torch securing ring.
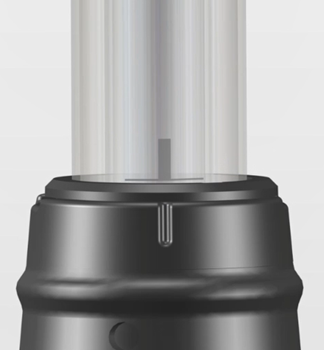
Torch quartz tube inserted into torch body
Torch disassembly
  |
Hot Surface |
To disassemble a semi-demountable torch:
You may need a flat head screwdriver to loosen the torch seal if you cannot slide the torch quartz tube out of the torch body by hand.
- Loosen the torch seal by prying it up by hand at the slot indicated by the orange circle on the image below.
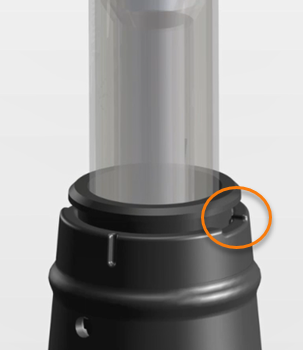
Loosen the torch seal by hand.
Only use a screwdriver if you cannot loosen the torch seal by hand.
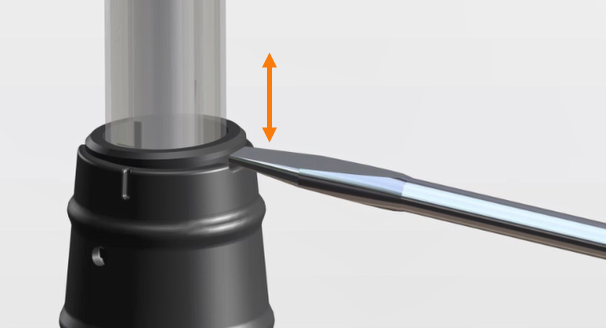
To use a screwdriver to loosen the torch seal:
- Insert the screwdriver into the slot between the torch securing ring and the torch body.
- Gently move the screwdriver up and down to separate the torch securing ring from the torch body.
- Repeat Steps a and b on the slot on the opposite side.
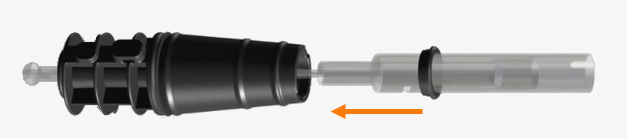
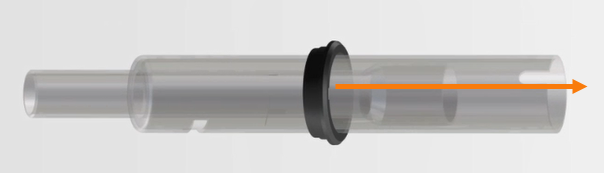
- Maintaining a straight parallel movement, carefully slide the quartz outer tube-set off the torch body. Avoid contact between the quartz tube-set and the injector.
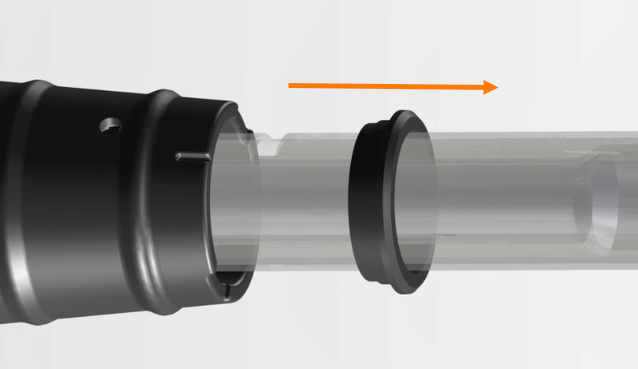
- Slide the seal off the top end of tube-set to remove it in the direction indicated by the arrow.
See also: