Clean the Torch
To help you achieve the maximum usable life from your ICP-OES Easy Fit torch, it is recommended that the following cleaning procedures are followed as soon as any discoloration appears on the outer tube of the torch. To maximize torch lifetime and prevent contamination, you should inspect the condition and cleanliness of the torch on a daily basis.
For fully demountable torches (you can remove the injector from the torch body) see the instructions that came with it for both assembly and cleaning information.
There are several steps to clean the torch:
- Removing the torch
- Acid cleaning of the torch for aqueous and acid based samples
- Cleaning the torch for organic based samples
- Rinsing the torch
- Drying the torch
- Additional checks
- Installing the torch
  |
Hot Surface |
 |
There is no need to turn the power off to the instrument. |
Removing the torch from the ICP-OES
 |
This video provides information on how to install and remove the torch. |
 |
To prevent damage to the torch, always take care when handling or storing it. |
- Turn off the plasma.
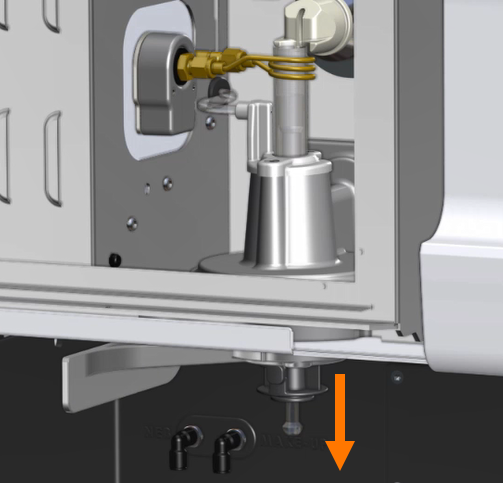
- While holding the spray chamber, remove the torch clamp to disconnect the spray chamber from the torch. See Figure 1.
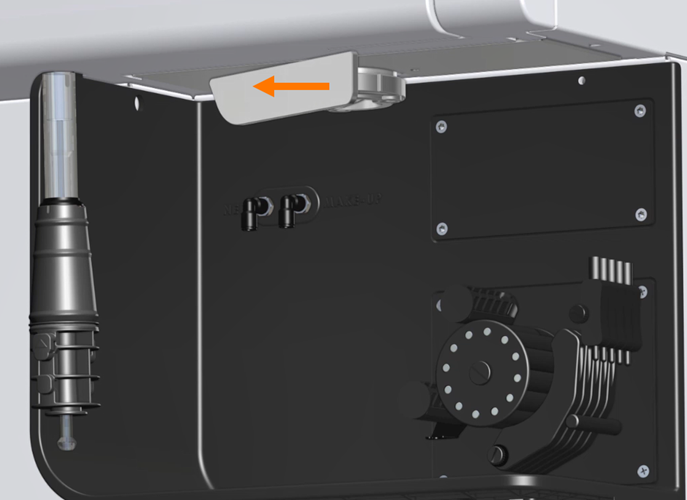
- Pull the torch loader handle open. See Figure 2.
- Gently pull the torch down out of the torch compartment.
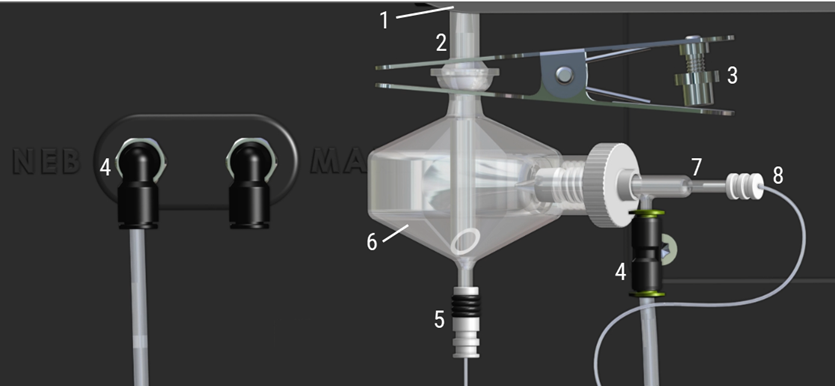
Figure 1. Torch, spray chamber and nebulizer connections
Where:
|
1. Torch loader handle |
4. Nebulizer gas connections |
7. Nebulizer |
|
2. Torch |
5. Spray chamber drain tubing |
8. Nebulizer solution inlet tubing |
|
3. Torch clamp |
6. Spray chamber |
|
 |
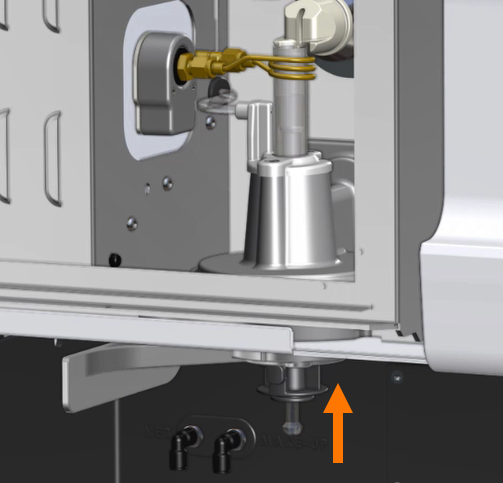 |
Figure 2. Moving the torch handle (side to side) and inserting and removing the torch (up and down)
Acid cleaning of the torch for aqueous or acid based samples
|
Do not use cleaning wire or abrasives like brushes or a scourer to clean the torch. Avoid acid contact with the seal where the quartz meets the plastic base. Damage to the seals and torch body may occur. |

|
Hot Surface and Chemical Hazard |
 |
This video provides information on how to clean the semi-demountable and one-piece torches when used with aqueous or acid based samples. Click here for additional cleaning instructions for torches used with organic samples. |
Use a clean, wide diameter, open-top beaker (preferably 100 mL tall form) or a similar container to hold the soak solutions. Use the recommended torch cleaning stand for ICP-OES Easy-fit torches (part number G8010-68021) to hold the torch inverted while soaking during the cleaning process. The torch cleaning stand aids in cleaning the torch, preventing damage to the fragile end of the quartz outer tube and limiting exposure of the elastomer materials on the torch body to acid fumes, reducing premature degradation.
- Use clean/particle free detergents or acid to perform the soak.
- Ensure the acid does not contact the seal between the quartz outer tube and the plastic base.
- Do not soak the removable top seal of semi-demountable torch.
- Keep the torch vertical, with the ball joint at the top, throughout all cleaning and rinsing steps unless otherwise directed.
- Do not remove the torch adhesive cap on the one-piece torch that covers the seal between the quartz and the plastic.
- For a better clean, always disassemble the semi- or fully demountable torch during rinsing and drying procedures.

Figure 3. Torch cleaning stand with larger outer tube set cleaning plate (top plate) and smaller injector cleaning plate (bottom plate)
To clean the torch:
- If using a semi-demountable torch, disassemble it for easier cleaning.
- Prepare a 50% Aqua Regia solution (1 part deionized water to 1 part Aqua Regia) in a wide diameter open beaker. To make Aqua Regia combine 1:3 concentrated nitric acid: hydrochloric acid.
- Place the beaker containing the acid solution under the torch cleaning stand.
- Soak the quartz parts of the torch in 50% aqua regia for at least 1 hour. The length of time required for the cleaning procedure will depend upon the extent of the contamination. Do not leave the torch in the acid for longer than 4 hours. If deposits remain after using 50% Aqua Regia, repeat the cleaning process using a higher concentration of Aqua Regia.
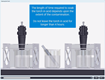
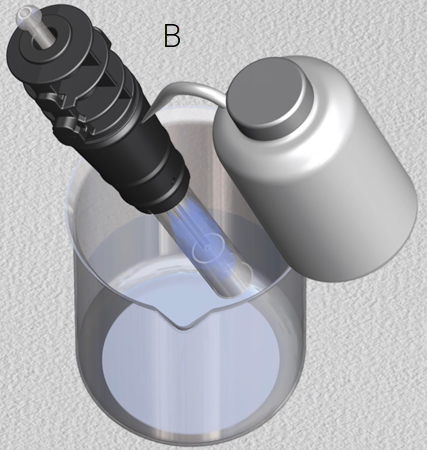
- Place the torch in the aqua regia solution through the hole provided in the torch cleaning stand as shown in Figure 4A, B, C and D. Ensure the quartz outer tube along with the injector is immersed in the solution.
- For soaking the injector without the quartz outer tube-set (Figure 4B), the torch injector tube plate should be installed to the torch cleaning stand to minimize exposure of the torch body to the acid fumes.
- For semi or fully demountable torches, the quartz outer tube-set can be removed and soaked separately in a beaker of aqua regia (Figure 4C).
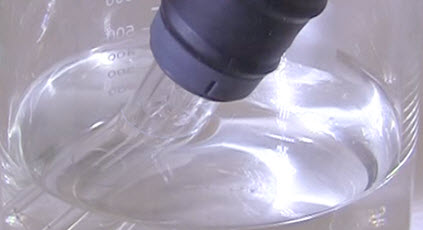
- Pipette some of the acid through the ball joint of the injector to remove build-up from the lower part of the injector. See Figure 6.
Figure 4. A. Bonded torch in acid and B. demountable torch body with injector in the acid, C. Torch outer tube in acid. A and B placed in an the torch cleaning stand with an open wide diameter beaker with acid level just below the plastic base. Keep the one-piece torch inverted through all the cleaning and rinsing steps unless otherwise directed. Ensure the tube set and injector is immersed in the solution.
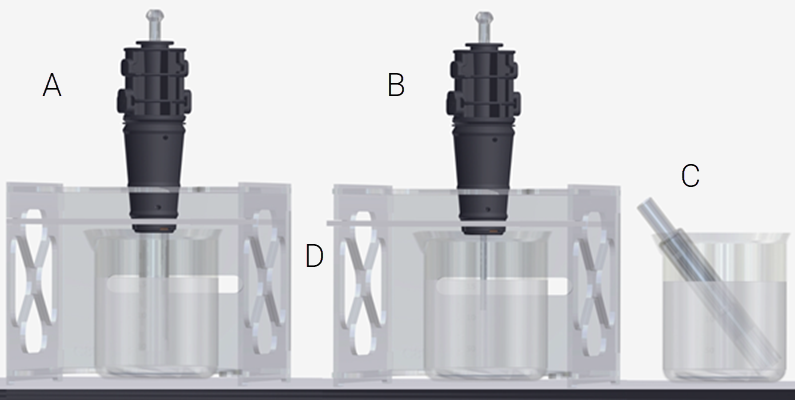
Figure 5. Close up of torch placed in vessel, highlighting acid level relative to the plastic base if not using the torch cleaning stand
Figure 6. Pipette liquid through ball joint of the injector
- Rinse the torch and outer tube-set thoroughly and dry completely prior to using the torch in the instrument.
- Follow the steps outlined below for “Rinsing the torch” and “Drying the torch” listed below.
Cleaning the torch for organic based samples
| |
Hot Surface Using the muffle furnace or portable handheld propane torch will heat the torch to very high temperatures. Always wear appropriate safety equipment when handing heated torch components. |
Semi-demountable torch components
The typical method is to bake the quartz torch tube from a demountable torch in a muffle furnace at approximately 500 °C.
|
Do not put any part of the torch that contains plastic into the muffle furnace. |
One-piece torches or components attached to the plastic torch body
|
Wrap a wet cloth around any plastic component to prevent overheating before using a portable handheld propane torch to remove the carbon deposits. |
- For one-piece torches or as an alternative to using a muffle furnace, use a portable handheld propane torch to burn off the carbon deposits.
- The outer tube and injector should be stood in a vertical position until they have cooled.
Rinse the one-piece or semi-demountable torch afterwards following the procedure below.
Rinsing the torch
To rinse the torch:
- Hold the torch with the ball joint connector at the top. See Figure 7A.
- Thoroughly flush the inside and outside of the torch through the ball joint connector and upper and lower gas ports, with deionized water (18 MΩ.cm) using a wash bottle to direct the water stream. See Figure 7.
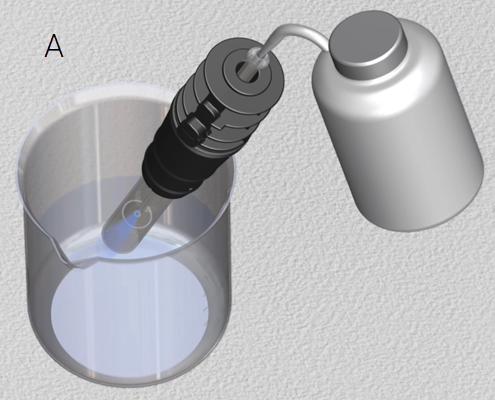
Figure 7. A. Rinsing the torch through the injector. B. Rinsing through the upper gas supply port.
- Invert the torch so that the quartz tubes are at the top and the ball joint connector is at the bottom. Direct rinse water through the quartz tubes so that the water flows out of the gas entry ports and ball joint connector for at least 30 s. Not shown here.
- If the torch was disassembled for cleaning, thoroughly wash the quartz outer tube-set and the removable top seal.
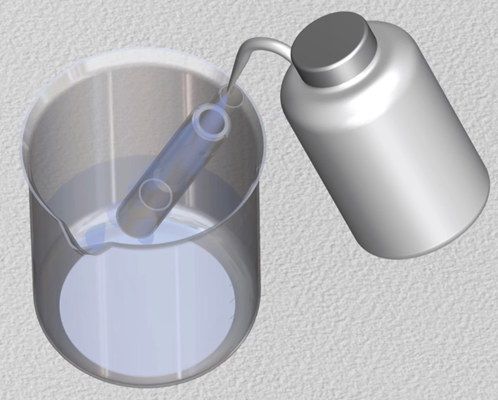
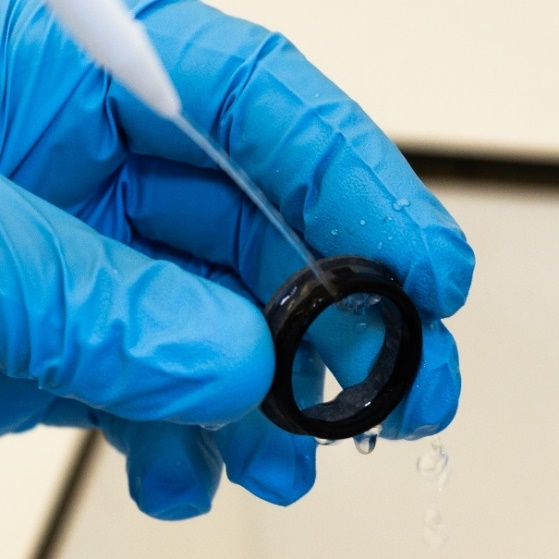
Figure 8. Rinsing semi-demountable outer tube-set and top seal
- Dry the torch completely and re-assemble the semi-demountable torch if necessary, prior to using the torch on the instrument.
Drying the torch
|
Do not place the plastic parts of the torch in a drying oven. It is not as effective at removing moisture as using compressed air, argon or nitrogen and may damage the torch. |
Drying the torch:
- Hold the torch inverted with the ball joint connector at the top. See Figure 9A.
- Blow clean compressed air or nitrogen through the gas supply ports (two on the base and through the ball joint connector) to remove moisture.
- Invert the torch and then blow clean compressed air, argon or nitrogen through the open end of the quartz outer tube-set. Do not insert the air nozzle inside the tube-set. Not shown here.
- Ensure that all moisture is removed before refitting the torch into the instrument.
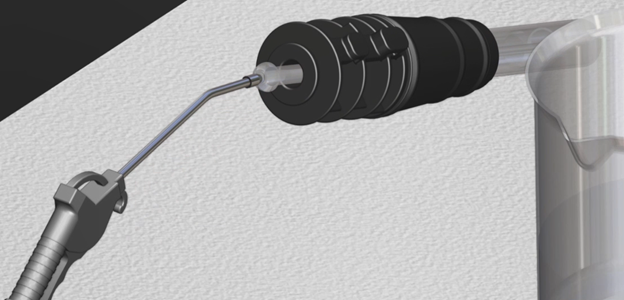
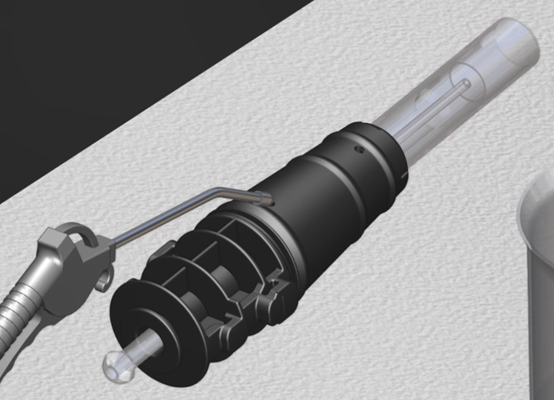
Figure 9. A. Drying the torch injector. B Drying through the upper gas supply port.
- If the torch was disassembled for cleaning, blow clean compressed air, argon or nitrogen through the quartz outer tube-set and top seal to remove all moisture.
- Carefully blow away any moisture left on the body of the torch and quartz parts.
- Ensure that all moisture is removed before refitting the torch into the instrument.
- For the semi- and fully demountable torch, it is advisable to disassemble the torch giving easy access to the torch body for complete drying.
Additional checks after cleaning
Perform the following checks after cleaning:
- Inspect the torch for damage such as loose fitting of the quartz tubes in the plastic base, holes or significant cracks. If any damage is found, replace the torch immediately.
- Check for carry-over after refitting the torch to determine if the cleaning procedure has been sufficient. If carry-over is found, repeat the cleaning process.
- Replace the torch when the outer surface of the quartz outer tube is rough to the touch (which indicates signs of wear), or if there are any cracks visible.
|
Long term exposure to acid during cleaning may lead to discoloration of the plastic base. This change is cosmetic only and should not impact performance if the torch is clean and the results of the other torch checks are satisfactory. |
Store the torch in the original box or a plastic bag when not in use or alternately, use the Agilent ICP-OES Easy-fit torch storage rack (P/N G8010 67000).
Reassemble and Install the torch
Reassemble the torch and then install the torch.