Cleaning the Cone
The cone requires regular preventative maintenance. Agilent recommends cleaning the cone on a weekly to monthly basis.
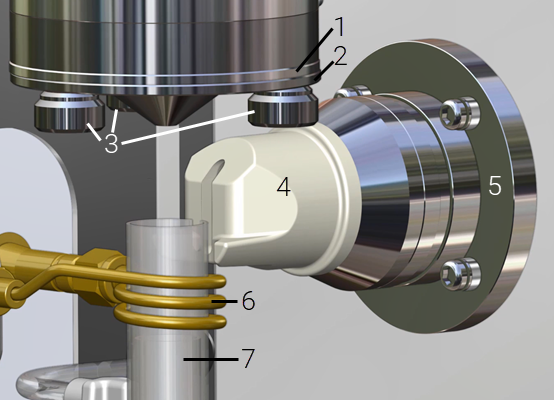
Torch compartment
Where:
|
1. Axial window assembly |
4. Snout |
7. Torch |
|
2. Cone |
5. Radial window assembly |
|
|
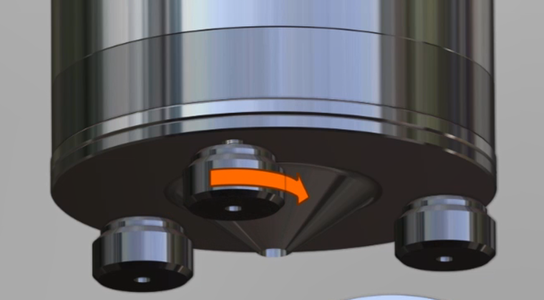
3. Cone thumb screws |
6. RF coil |
|

|
Chemical Hazard and Hot Surface Allow several minutes for the cone to cool down before removing it. |


 |
This video demonstrates how to clean the cone. |
- Remove the torch (if present) and then snout by pulling it towards the front of the instrument.
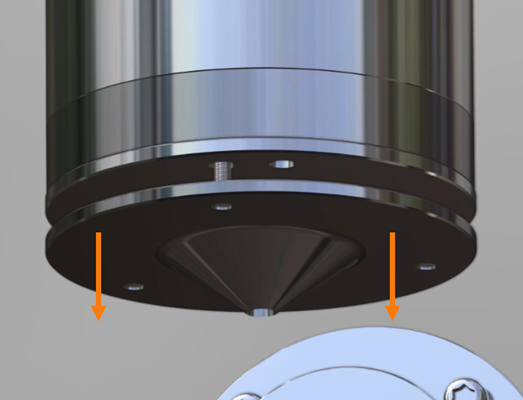
- Undo the three thumb screws holding the cone in place. See image above.
- Pull the cone off of the axial window assembly.
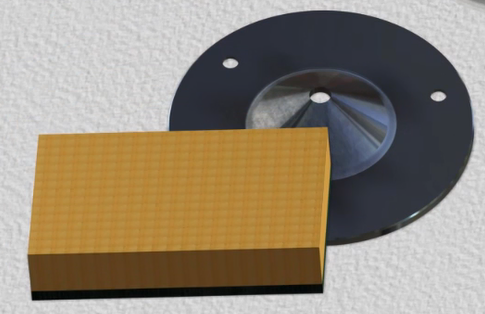
- Dip the cone in deionized water and scrub with a scourer. Alternatively, use a damp soft cloth and a suitable cleaning powder (such as a stainless steel cookware cleaner).
- Clean the orifice and both sides of the cone. Rub in a circular motion.
- Rinse the cone well in deionized water and then dry with a clean cloth.
- Line up the screws with the holes in the cone and push the cone onto the axial window assembly.

- Tighten the thumb screws firmly by hand.
 |
If the thumb screws holding the cone in place are not tightened firmly enough the cooling properties of the cone may be affected. |